
Aigency SAAS is a distinct product from the HTML5 version.
To use this version, you need to meet certain requirements:
• Hosting server with PHP 7.4 or higher.
• MySQL database.
• Email and SMTP configurations.
• Cron PHP enabled on the server.
If you want to use the text-stream option, we recommend checking the compatibility of your server. To do this, download the following script and execute it on your server:
https://polartemplates.com/text-stream/
If you don't have a server, we recommend using Hostinger for this application:
https://www.hostinger.com.br/
Hostinger is a fast and easy-to-configure server, and it is the same one used in the demo version.
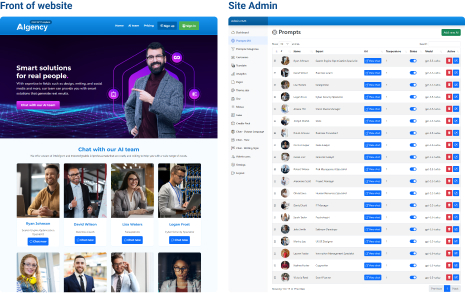
The project consists of two distinct parts. The first part is the front-end interface of the website, where users will have access to the intelligences. The second part is the administrative area, where one or more administrative users will have full control of the site.
To engage in conversations with the artificial intelligences, users utilize credits. Each letter in the AI's response consumes 1 credit. For example, if a user receives responses with 10,000 characters of text, they will spend 10,000 credits. When the user runs out of credits, they will need to purchase more through the recharge plans.
This documentation is text-based. However, if you prefer, we have a step-by-step video guide available to assist you. You can find it at the following link:
https://www.youtube.com/watch?v=Im-RElsqlQ4
When downloading the files, you will have access to a "files" folder and an "sql" folder. Initially, we will use the SQL file to configure our database.
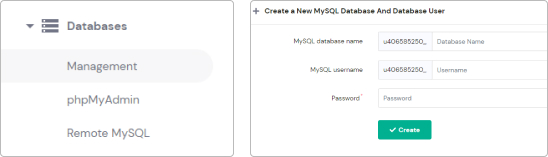
To create the database, locate the option to create a new database on your hosting. Fill in the fields with the database name, database username, and password. Save this information in a secure location, as we will need it later.
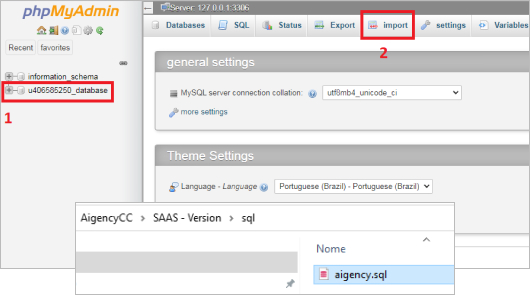
Next, access phpMyAdmin in your hosting, select the database you created, and click on the "Import" option. Then, import the "aigency.sql" file from your computer. Once this is done, your database will be ready for use.
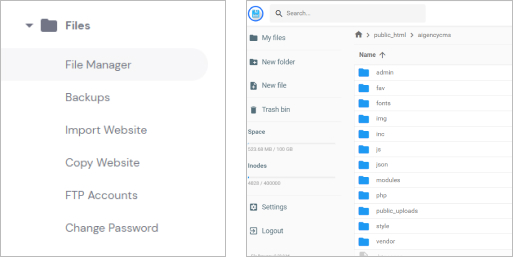
Now, we will upload the files to the hosting server. To do this, use the file manager provided by your hosting or a similar FTP program.
It's important to note that you should install the system in the root directory of your website or in a subdomain.
Upload all the files from the "files" folder to your hosting server.
Verify that all files have been successfully uploaded.
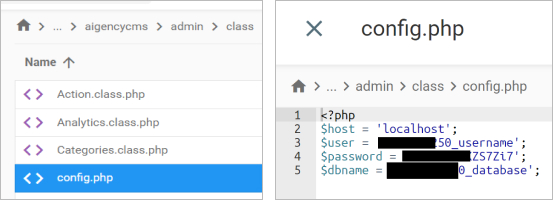
If you try to access your site now, you will see a connection failure message. To fix this, access the "admin/class/" folder and open the "config.php" file.
Change the credentials with the data you saved when creating the database. Save the file and refresh the page.
If everything is correct, you will see the site functioning.
When attempting to exchange messages with an artificial intelligence, you will notice that the site does not provide responses.
This is because you still need to configure your OpenAI API key.
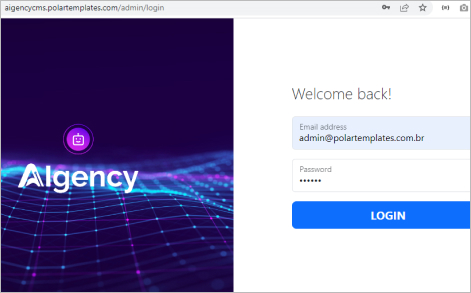
To do this, access the administration panel of your site by adding "/admin" at the end of the URL. Then, use the following default login credentials:
Email: admin@polartemplates.com.br
Password: 123456
You can change this password later in the panel under the "Users" option.
Upon logging in, you will find the administrative options of the website. Next, go to the "Settings" option and configure your API key.
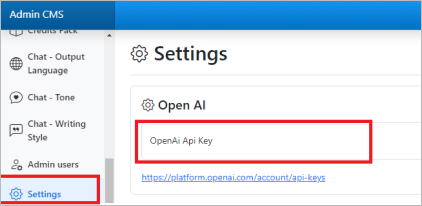
Please use the link below to create your API key.
https://platform.openai.com/account/api-keys

Please ensure that your key is valid and that you have sufficient credits on the OpenAI platform.
https://platform.openai.com/account/usage
After entering your key in the field and saving it, the chat will be operational.
